This end table was a curbside find that my parents picked up. I really love the lines but it was in pretty bad shape when I got it. As you can see the leather top was a mess and the edges were pretty rough. So, I decided to give it some love by cleaning it up and painting it. Here are two "before" pictures:
First, I decided to remove the leather top. I wasn't sure how difficult this was going to be but, to my surprise, it was pretty easy. After my online research I decided that using my steamer was going to be my best bet. So, I pulled out the steamer and with only a bit of patience and a putty knife the leather top came off without much effort...and in one piece!
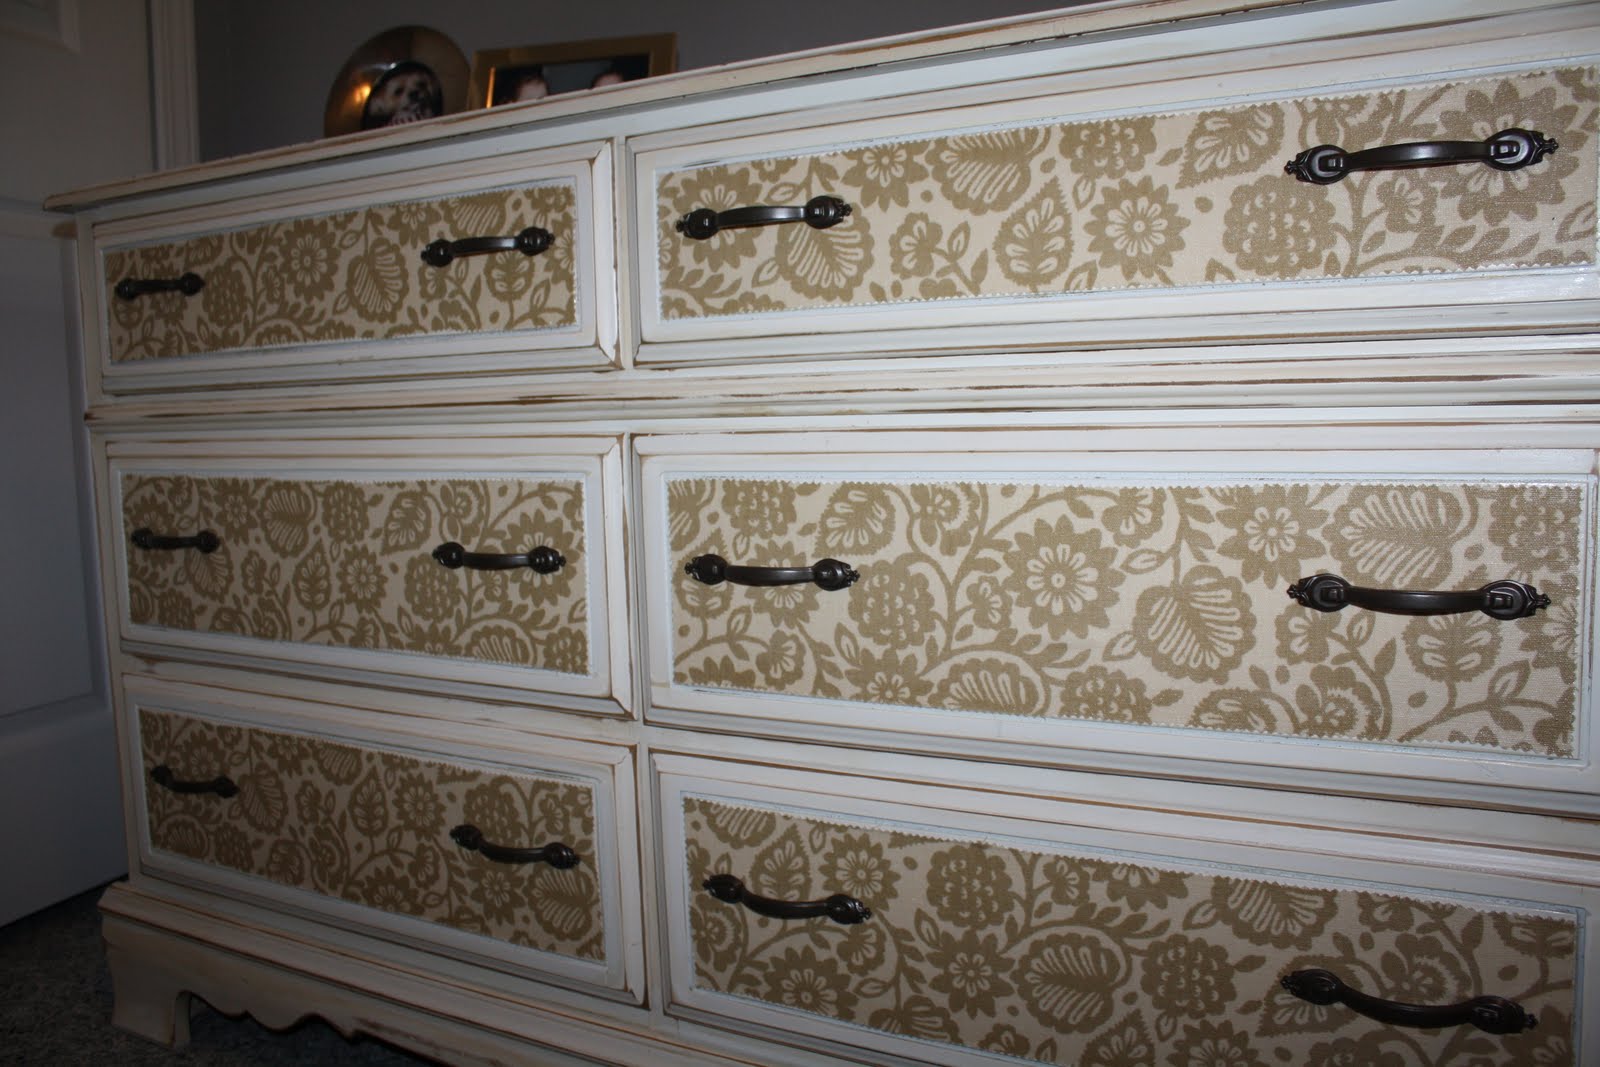
After a bunch of sanding, some patching with wood putty and spackle, primer and spray paint I have a nice modern table. I chose to use the same hardware because I like the design and actually love the patina on it from years of use.
There may be another project in line for this table in the future. Since I didn't replace the leather top I am still contemplating what to do with the top. I do think I could just leave it as is. There is a small dip between the area on the top where the leather was and the rest of the top but I don't see it as being an issue. I have considered buying a piece of glass to put on top and maybe putting some pretty paper under it. We will see. I'm sure at some point I will be looking for a small project to do and this will satisfy my urge. :) If and when this happens I will share the result at that time.
Finally, here is a side-by-side before and after picture:

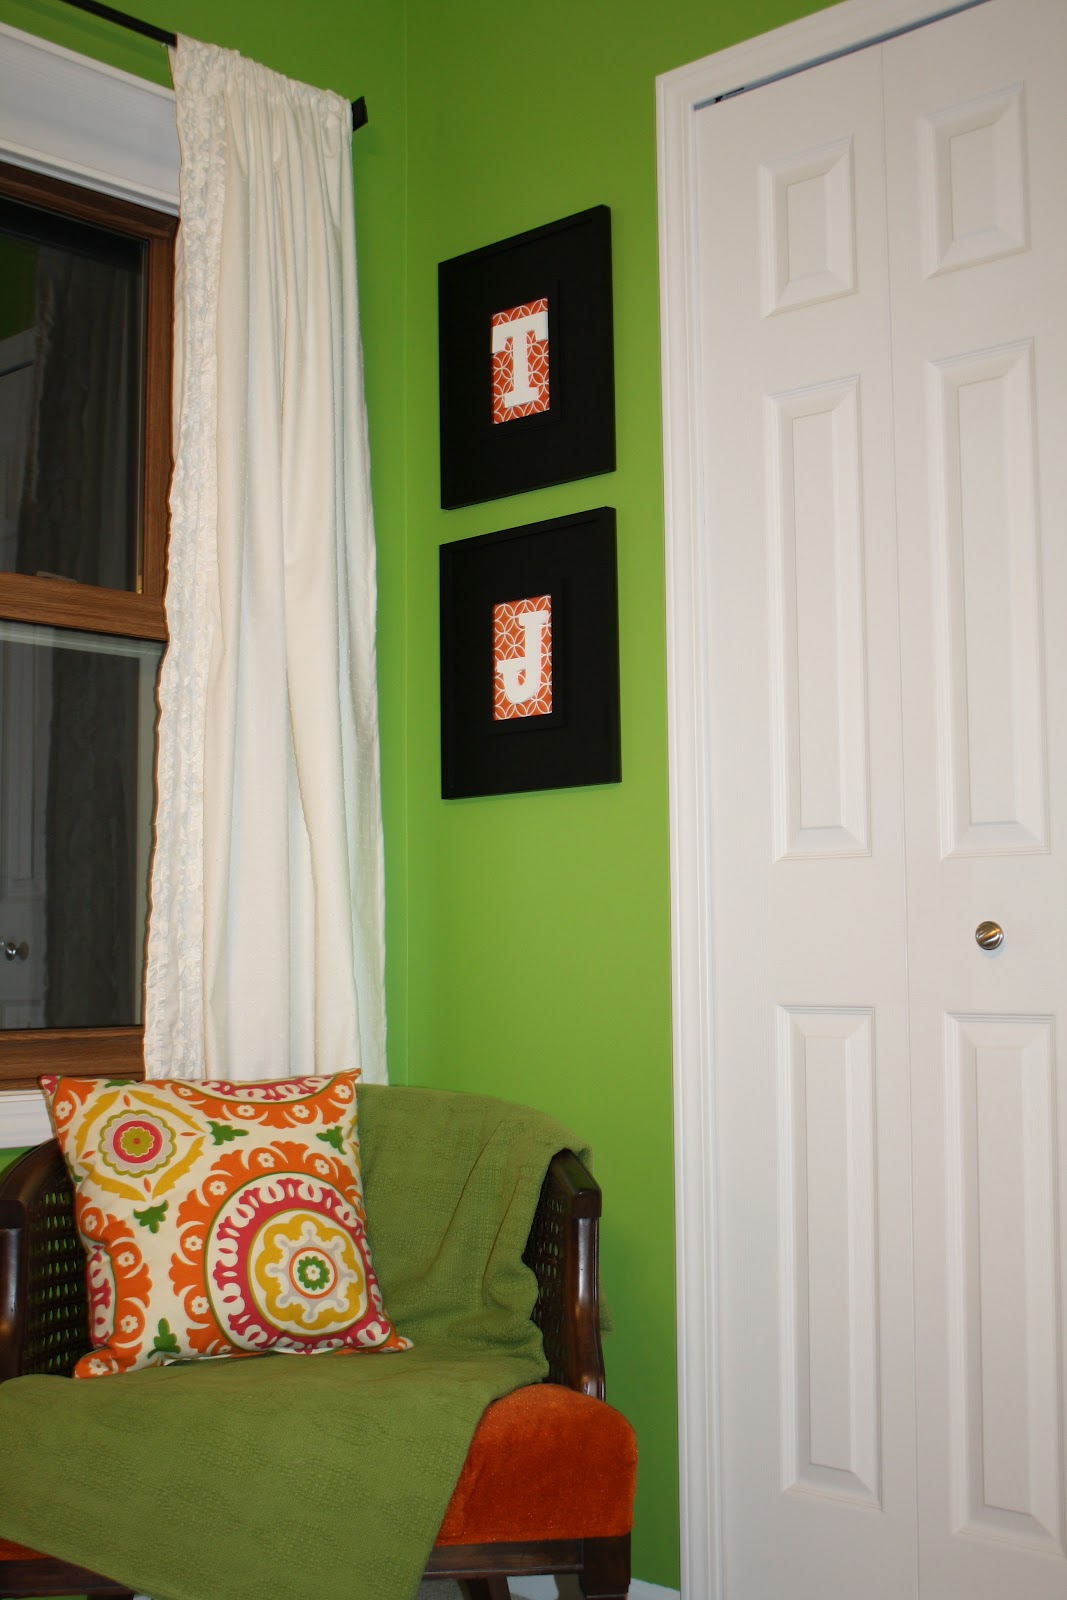
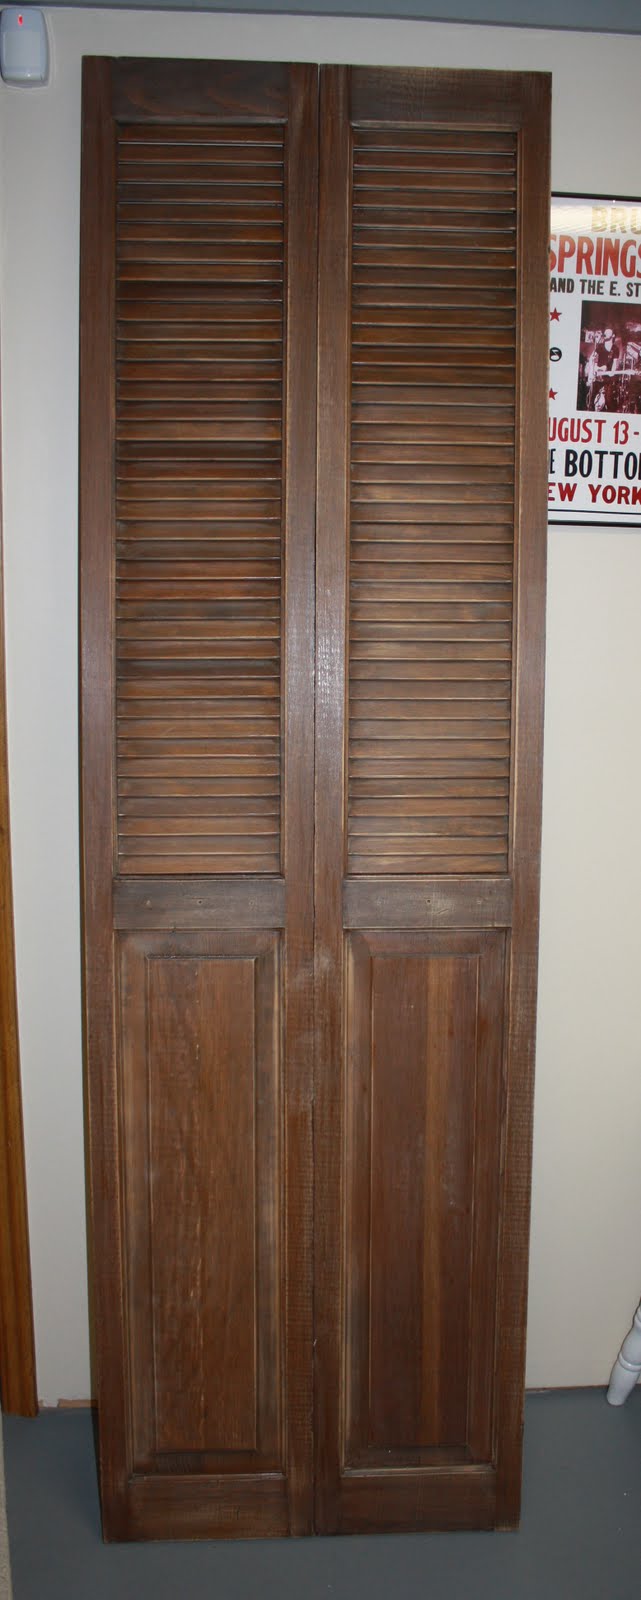
 I picked up this old broken window from the garbage a couple years ago. It has been wrapped in a blanket in my attic all this time. Recently, I came up with this idea to fill space on my bare family room wall. Here's what I did. You can't tell from the photo, but the glass is missing in three of the openings. In order to create symmetry, I moved one of the panes so I had them where I wanted them. Next, I took some extra fabric from my family room curtains and cut it to fit inside the window squares. To get the fabric to stick, I used spray fabric starch. I layed the window face-down, placed the fabric on the window and soaked it with the starch. Once the fabric dried, it stuck to the glass. Originally, I thought the fabric would be enough but it wasn't. So, after completing my previous project with the initials in my master bedroom, I decided to use the wooden letters to add additional interest. Finally, I added the felt flower I made to round out the arrangement.