And the result...a jewelry holder/display:
Sharing fun design ideas, finds, and projects that make me happy...and hopefully, you too!
Wednesday, November 30, 2011
Jewelry hanger made from old closet door
Wednesday, September 28, 2011
Guest blogger...Carolyn
A special thanks to a follower/friend for today's blog post. When Carolyn shared with me her great re-purpose project, I just had to share it! I just love seeing what wonderful creativity people have when it comes to re-purposing furniture! Here is what she said:
Tammy,
I thought you might like to see what we did with an old hutch we had. We made a hanging bookshelf for our foyer. I needed something for the space, it couldn't be deeper than 12 inches and I couldn't find anything in the furniture stores that I liked. The picture of the hutch is a similar version of what we used.
Tammy,

Thursday, September 15, 2011
Old Dresser Gets a Fresh Look
This dresser goes with a funiture set my parents bought me when I was a child. I put it to good use for about 25 years before my dad made me a new set. As you can probably tell from the picture, it stayed in wonderful condition over the years - which is why I have kept it so long. It even went through a quick makeover when I was in my early teens -- my parents gave it a fresh coat of paint and new hardware.
Next, I sanded the dresser. I wanted the edges to look worn from years of use, so I really focused on removing the paint on most of the edges. At this point, I realized how light in color the pine wood was and wanted to give the edges a treatment that would make them pop. So, I rubbed stain on the edges - now they have an antique look and really stand out.
Last, I decided to add an interesting detail to the drawer fronts. I found fabric at a craft store that coordinated with my spare bedroom decor, cut it to fit the drawer fronts, and used Mod Podge to glue the fabric to the furniture. To do this, I painted the Mod Podge on the drawer fronts and placed the fabric over it. After it dried completely, I put another coat over the top of the fabric to give it a little shine and to ensure it would stay in place. (Tip: if you use this technique and want a shiny look, proceed with another 4-5 coats of Mod Podge). For this project, I liked the texture after only one coat.

When I bought my first home and moved out of my parents' house I left it behind because I didn't have room for it. About a year and a half ago, I moved into my new home and my parents were happy that I'd finally have room for it at my place. Because of the history, and since there is really nothing wrong with it, I wanted to put it to good use - but not before giving it a makeover!
Next, I sanded the dresser. I wanted the edges to look worn from years of use, so I really focused on removing the paint on most of the edges. At this point, I realized how light in color the pine wood was and wanted to give the edges a treatment that would make them pop. So, I rubbed stain on the edges - now they have an antique look and really stand out.
Last, I decided to add an interesting detail to the drawer fronts. I found fabric at a craft store that coordinated with my spare bedroom decor, cut it to fit the drawer fronts, and used Mod Podge to glue the fabric to the furniture. To do this, I painted the Mod Podge on the drawer fronts and placed the fabric over it. After it dried completely, I put another coat over the top of the fabric to give it a little shine and to ensure it would stay in place. (Tip: if you use this technique and want a shiny look, proceed with another 4-5 coats of Mod Podge). For this project, I liked the texture after only one coat.
Next, I replaced the hardware and the job was complete!
Tuesday, August 2, 2011
Tiny Bird Gets a Facelift
Thursday, July 21, 2011
Low-Cost Redo
Before |
Redecorating does not have to be expensive. My laundry room re-do took very little more than fresh paint...and had quite an impact! First, the wallpaper was removed. From the photo, it appears there is only a border...that's what my husband and I originally thought. Once we started removing it we realized there was wallpaper on all the walls...it was just disguised by paint. What a disappointment, now we knew the job would take at least an extra day to remove the wallpaper. (We didn't want to just paint over it because when you paint wallpaper the seams are likely to show.) So, we moved forward full speed ahead knowing that removing the wallpaper was going to be twice as difficult. Thank goodness for the wonderful inventions of the steamer and the piranha (a tool you use to score the wall, allowing water/steam to get under the wallpaper, loosening it so you can scrape it off) -- these tools made the job a little less laborious.
Once we conquered the wallpaper, we painted the doors and moldings. Finally, it was time to paint the walls! I chose to use leftover green and turquiose paint from my master bedroom and family room. I wanted to do something fun since doing laundry isn't typically something we look forward to. I figured the bright colors and stripes would do just that. Since the room is relatively small, I decided to do two walls in stripes and the others solid. This saved quite a bit of time and helped break things up a bit.
After |
Lastly, I accessorized with my mini washboard (shown in the "after" photo above), 3 decorative heat vent covers, and curtains. I picked up the washboard several years ago at an antique store; found the vent covers recently at an antique sale; and made the cafe curtains from fabric I purchased at a craft store.
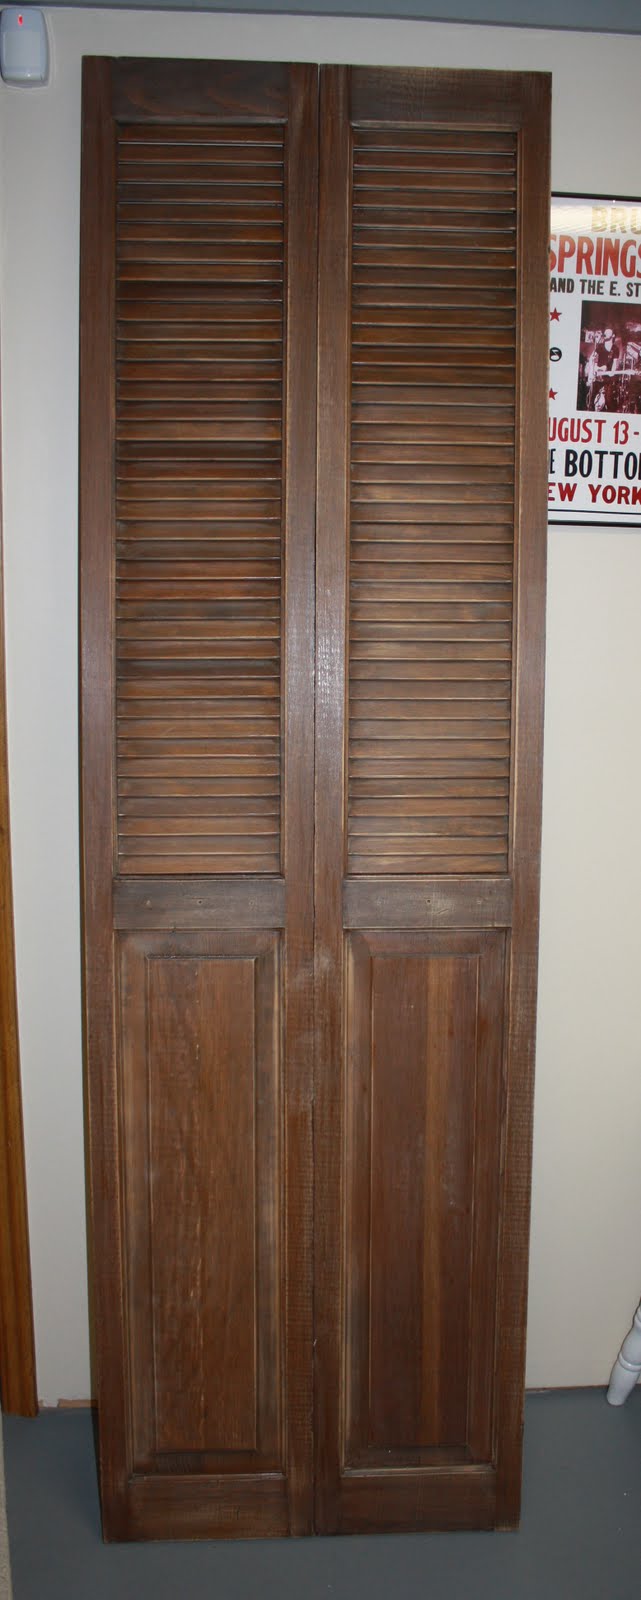
Saturday, July 9, 2011
Inspired...
Once we got the treasure home, my husband and I started the project by removing the doors, hardware, glass and back panel from the cabinet. Then, I lightly sanded everything using a palm sander and a little elbow grease. My husband also put his carpentry skills to work by adding a wine rack inside. To do this, he removed the shelf inside and cut it. He also installed a divider between the wine rack area and the remainder of the inside so he could reinstall the shelf and use it to stabilize the wine rack. Then we purchased 4" PVC pipes to make the wine rack. They were cut to size and painted with Krylon Fusion plastic spray paint. Finally, we glued the pipes together and secured them inside the cabinet.
Although I loved the turquoise paint on the inspiration piece, the color combination didn't coordinate with the decor in my kitchen. So, I decided on a neutral satin black paint and fabric to coordinate with my window treatments, area rugs, and barstool seats.
Monday, June 20, 2011
Headboard Made from Old Closet Doors
My dog, Stuey obviously approves. |
Monday, May 23, 2011
Subtle details add texture and interest.
Then one day I was at Home Goods and found these great red leather Parsons chairs for $40 on clearance. After calling 10 stores in the metro-Detroit area and driving an hour out of my way, I had the 4 I needed! I love the way the red leather breaks up the wood, adds color, texture and a contemporary look!
Monday, May 16, 2011
My First Post - So Chick (not Chic)
I love the bird-themed finds that are so popular right now: bedding, accessories, even adorable drawer pulls! When I'm out-and-about treasure hunting I have to get my self-control in check to avoid buying everything with our feathered friends on them! Anyway, here is a cool find I didn't pass up. I bought these guys at a consignment store for about $4 each -- cute shape, but not-so-cute color.
So, I decided to paint them a matte white -- actually, I just used white primer. Keep in mind, since they were glossy, I roughed them up with sandpaper first Then, after a coat of primer, I sanded the edges again to give them the shabby chic look. So cute, huh? :)
Subscribe to:
Posts (Atom)